One of the critical factors for an effective install is a well-prepared and well-designed graphic, especially when it comes to tiled large graphics. Tiling for large wall graphics requires more preparation and planning.
What you’lL learn:
Effective install starts with well-designed, accurately dimensioned graphics.
Ensure precise wall measurements and half-inch bleed allowance.
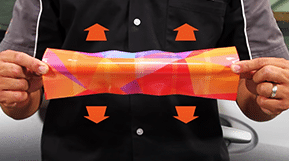
Use horizontal/column tiling for tall graphics, with overlap on edges.
Overlap size depends on film type, from 1/8″ to 1/2″.
Use RIP software for tiling, and an accurate placement.
Create mockup with dimensions, prep tiles for transport.
Play Video
Share this video:
Tiling for Large Wall Graphics
Preparing the Graphic
When starting the job, it is important that the graphic designer has accurate dimensions of the wall. The designer must allow at least half an inch bleed all around the graphic.
For wall graphics taller than 60 inches, horizontal or column tiling is preferred—where the overlaps will be on the left and right edges of the print.
The type of material determines the amount of overlap. For cast films, at least 1/8″ to 1/4″ inch overlap will be sufficient. Depending on the type of calendered films, the overlap can be at least 1/4″ to 1/2″ inch.
Remember, tiling must be done by the RIP software – such as Versaworks or ONYX – and NOT in design software like Illustrator or Photoshop. Using the RIP software for tiling eases the design process. This ensures that the overlaps will be properly placed and there will be no need for a separate file per tile.
Before printing, determine which width of media will be best to minimize waste in the overlap areas when tiling the graphic.
Print a downscaled mockup of the graphic on a piece of paper. Label the tiling sequence and include the actual dimensions and distance between seam lines.
Tiling for large wall graphics is easier with a detailed mockup.
Preparing the Tiles for Transport
After printing, drying, and laminating, separate each tile. Take note that you will be installing the bottom-most tile first in the overlapping sequence. Cut the white, unprinted edges off the overlapping tiles.
Carefully align the overlaps of the two adjacent tiles. Apply small strips of blue masking tape across the seam every 2 feet down the graphic.
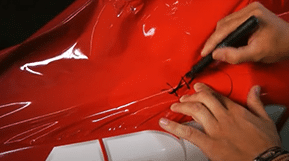
In order to prevent cutting on the real graphic, use a small piece of release liner under the blue masking tape. Cut the masking tape along the edge of the overlaying tile. This will serve as registration marks for installation. Repeat this process on all panels. Then, using a release liner knife, cut a 2-inch strip in the liner approximately 6 inches away from the top edge on each tile. Leave this liner strip in place.
Use this release liner knife to install your finished graphics.
Next, label each tile accordingly with the mockup print and roll them up on a core in reverse sequence. You are now ready to ship the graphic to the job site. In conclusion, by considering the desired results and the actual application process, you can eliminate frustration, wasted time and effort, and costly mistakes.
Now you are an expert in tiling for large wall graphics… But do you know how to clean a finished wall graphic? Learn about cleaning large wall graphics right here at WrapItRight.
Removing old graphics can be a time consuming part of any wrap project. This video shows expert techniques...
Add your comment
Your email address will not be published. Required fields are marked.*
This site uses Akismet to reduce spam.
Learn how your comment data is processed.
Lorem ipsum dolor sit amet, consectetur adipiscing elit, sed do eiusmod tempor incididunt ut labore et dolore magna aliqua. Quis ipsum suspendisse ultrices gravida. Risus commodo viverra Maecenas.
guest_l8uf0ka95
Lorem ipsum dolor sit
Lorem ipsum dolor sit amet, consectetur adipiscing elit, sed do eiusmod tempor incididunt ut labore et dolore magna aliqua. Quis ipsum suspendisse ultrices gravida. Risus commodo viverra Maecenas.
guest_0jf3ajmap
Lorem ipsum dolor sit
Lorem ipsum dolor sit amet, consectetur adipiscing elit, sed do eiusmod tempor incididunt ut labore et dolore magna aliqua. Quis ipsum suspendisse ultrices gravida. Risus commodo viverra Maecenas.
guest_z97p2har7
Lorem ipsum dolor sit
BECOME A WRAP IT RIGHT INSIDER
Get expert vinyl installation videos straight to your inbox. Plus, unlock exclusive perks just for you.